feellikelearning
July 9, 2023
要开始一个React + Tailwind CSS项目,可以按照以下步骤进行操作:确保你的开发环境已经配置好,包括Node.js和npm(Node包管理器)。你可以在终端中运行以下命令来检查它们的安装情况:
node -v
npm -v
如果它们没有被正确安装,请先安装它们。
2 创建一个新的React项目。在终端中运行以下命令来创建一个新的React项目:
npx create-react-app my-project
这将会在当前目录下创建一个名为my-project
的新文件夹,并且自动生成一个基本的React项目结构。
3 进入项目目录。在终端中运行以下命令进入你刚创建的项目目录:
cd my-project
安装Tailwind CSS。在终端中运行以下命令来安装Tailwind CSS及其依赖:
npm install -D tailwindcss postcss autoprefixer
npx tailwindcss init
npm install -D tailwindcss postcss autoprefixer
npx tailwindcss init
这会在项目根目录下创建一个名为tailwind.config.js的文件。打开编辑,加入内容如下:
purge: ['./src/**/*.{js,jsx,ts,tsx}', './public/index.html'],
module.exports = {
purge: ['./src/**/*.{js,jsx,ts,tsx}', './public/index.html'],
// 其他配置选项...
};
module.exports = {
purge: ['./src/**/*.{js,jsx,ts,tsx}', './public/index.html'],
// 其他配置选项...
};
创建一个名为postcss.config.js
的文件,在项目根目录下:
module.exports = {
plugins: {
tailwindcss: {},
autoprefixer: {},
},
};
module.exports = {
plugins: {
tailwindcss: {},
autoprefixer: {},
},
};
在项目根目录下,创建一个名为src/styles/tailwind.css
的文件,并将以下代码添加到文件中:
@import 'tailwindcss/base';
@import 'tailwindcss/components';
@import 'tailwindcss/utilities';
@import 'tailwindcss/base';
@import 'tailwindcss/components';
@import 'tailwindcss/utilities';
/* 自定义样式 */
/* ... */
@import 'tailwindcss/base';
@import 'tailwindcss/components';
@import 'tailwindcss/utilities';
/* 自定义样式 */
/* ... */
修改src/index.js
文件,将文件中的导入语句修改为:
import React from 'react';
import ReactDOM from 'react-dom';
import './styles/tailwind.css';
document.getElementById('root')
import React from 'react';
import ReactDOM from 'react-dom';
import './styles/tailwind.css';
import App from './App';
ReactDOM.render(
<React.StrictMode>
<App />
</React.StrictMode>,
document.getElementById('root')
);
import React from 'react';
import ReactDOM from 'react-dom';
import './styles/tailwind.css';
import App from './App';
ReactDOM.render(
<React.StrictMode>
<App />
</React.StrictMode>,
document.getElementById('root')
);
修改package.json
文件中的scripts
部分,将build
脚本修改为:
"start": "react-scripts start",
"build": "react-scripts build && npx tailwindcss build -o src/styles/tailwind.css",
"test": "react-scripts test",
"eject": "react-scripts eject"
"scripts": {
"start": "react-scripts start",
"build": "react-scripts build && npx tailwindcss build -o src/styles/tailwind.css",
"test": "react-scripts test",
"eject": "react-scripts eject"
}
"scripts": {
"start": "react-scripts start",
"build": "react-scripts build && npx tailwindcss build -o src/styles/tailwind.css",
"test": "react-scripts test",
"eject": "react-scripts eject"
}
这将在每次构建项目时自动运行Tailwind CSS构建命令。
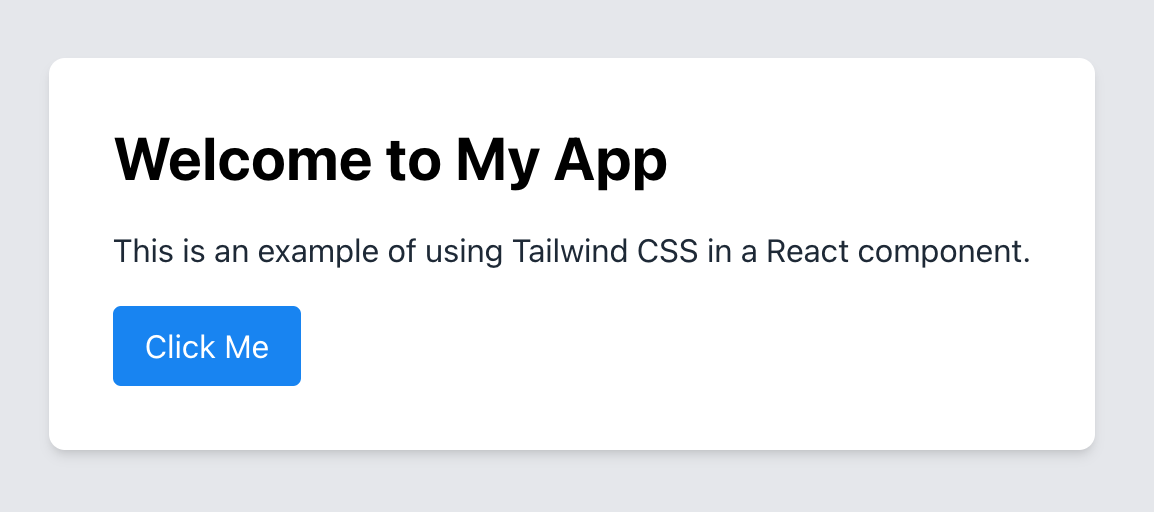
修改src/App.js如下,测试Tailwind css正常工作
import React from 'react';
<div className="bg-gray-200 h-screen flex items-center justify-center">
<div className="bg-white rounded-lg p-8 shadow-md">
<h1 className="text-3xl font-bold mb-4">Welcome to My App</h1>
<p className="text-gray-800">
This is an example of using Tailwind CSS in a React component.
<button className="bg-blue-500 text-white px-4 py-2 rounded mt-4">
import React from 'react';
const App = () => {
return (
<div className="bg-gray-200 h-screen flex items-center justify-center">
<div className="bg-white rounded-lg p-8 shadow-md">
<h1 className="text-3xl font-bold mb-4">Welcome to My App</h1>
<p className="text-gray-800">
This is an example of using Tailwind CSS in a React component.
</p>
<button className="bg-blue-500 text-white px-4 py-2 rounded mt-4">
Click Me
</button>
</div>
</div>
);
};
export default App;
启动React应用:
npm start
现在,每次运行npm run build
时,它将首先构建React应用程序,然后自动运行Tailwind CSS构建命令,生成最终的CSS样式文件。这样,你无需手动运行构建命令来更新样式文件。这些在修改代码后是会自动运行的,所以按以上步骤设置好以后开发者只需要编写代码就行。
这个例子生成的网页是这样的