
Add content for the websites
The content of the apache2 websites on Ubuntu is in
/var/www/html/We can put the website content (php, html files) in the subdirectories of the above path, such as
/var/www/html/site1
/var/www/html/site2
Set up Apache2
This article uses Ubuntu as an example. The files we need to edit are in
/etc/apache2First, add a new site config file in sites-available directory, such as site1
cd /etc/apache2/sites-available
vim site1.conf
The content of the site conf file is like
<VirtualHost *:80>
	# The ServerName directive sets the request scheme, hostname and port that
	# the server uses to identify itself. This is used when creating
	# redirection URLs. In the context of virtual hosts, the ServerName
	# specifies what hostname must appear in the request's Host: header to
	# match this virtual host. For the default virtual host (this file) this
	# value is not decisive as it is used as a last resort host regardless.
	# However, you must set it for any further virtual host explicitly.
	#ServerName www.example.com

	ServerAdmin webmaster@localhost
	ServerName site1.com
	ServerAlias www.site1.com
	DocumentRoot /var/www/html/site1

	# Available loglevels: trace8, ..., trace1, debug, info, notice, warn,
	# error, crit, alert, emerg.
	# It is also possible to configure the loglevel for particular
	# modules, e.g.
	#LogLevel info ssl:warn

	ErrorLog ${APACHE_LOG_DIR}/error.log
	CustomLog ${APACHE_LOG_DIR}/access.log combined

	# For most configuration files from conf-available/, which are
	# enabled or disabled at a global level, it is possible to
	# include a line for only one particular virtual host. For example the
	# following line enables the CGI configuration for this host only
	# after it has been globally disabled with "a2disconf".
	#Include conf-available/serve-cgi-bin.conf
</VirtualHost>
Then we can add conf file the second website, such as site2
cd /etc/apache2/sites-available
vim site2.conf
Add content to site2.conf
<VirtualHost *:80>
	# The ServerName directive sets the request scheme, hostname and port that
	# the server uses to identify itself. This is used when creating
	# redirection URLs. In the context of virtual hosts, the ServerName
	# specifies what hostname must appear in the request's Host: header to
	# match this virtual host. For the default virtual host (this file) this
	# value is not decisive as it is used as a last resort host regardless.
	# However, you must set it for any further virtual host explicitly.
	#ServerName www.example.com

	ServerAdmin webmaster@localhost
	ServerName site2.com
	ServerAlias www.site2.com
	DocumentRoot /var/www/html/site2

	# Available loglevels: trace8, ..., trace1, debug, info, notice, warn,
	# error, crit, alert, emerg.
	# It is also possible to configure the loglevel for particular
	# modules, e.g.
	#LogLevel info ssl:warn

	ErrorLog ${APACHE_LOG_DIR}/error.log
	CustomLog ${APACHE_LOG_DIR}/access.log combined

	# For most configuration files from conf-available/, which are
	# enabled or disabled at a global level, it is possible to
	# include a line for only one particular virtual host. For example the
	# following line enables the CGI configuration for this host only
	# after it has been globally disabled with "a2disconf".
	#Include conf-available/serve-cgi-bin.conf
</VirtualHost>
Finally, we need to create symbolic links for the conf files of the above two sites and place them in sites-enabled directory
ln -s /etc/apache2/sites-available/site1.conf /etc/apache2/sites-enabled/site1.conf
ln -s /etc/apache2/sites-available/site2.conf /etc/apache2/sites-enabled/site2.conf
May need to restart apache2
sudo service apache2 restartUpdate Domain Name DNS
Take Namecheap as an example, go to the target domain name, such as site1.com, click Manage, and then in Advanced DNS, setup is as follows
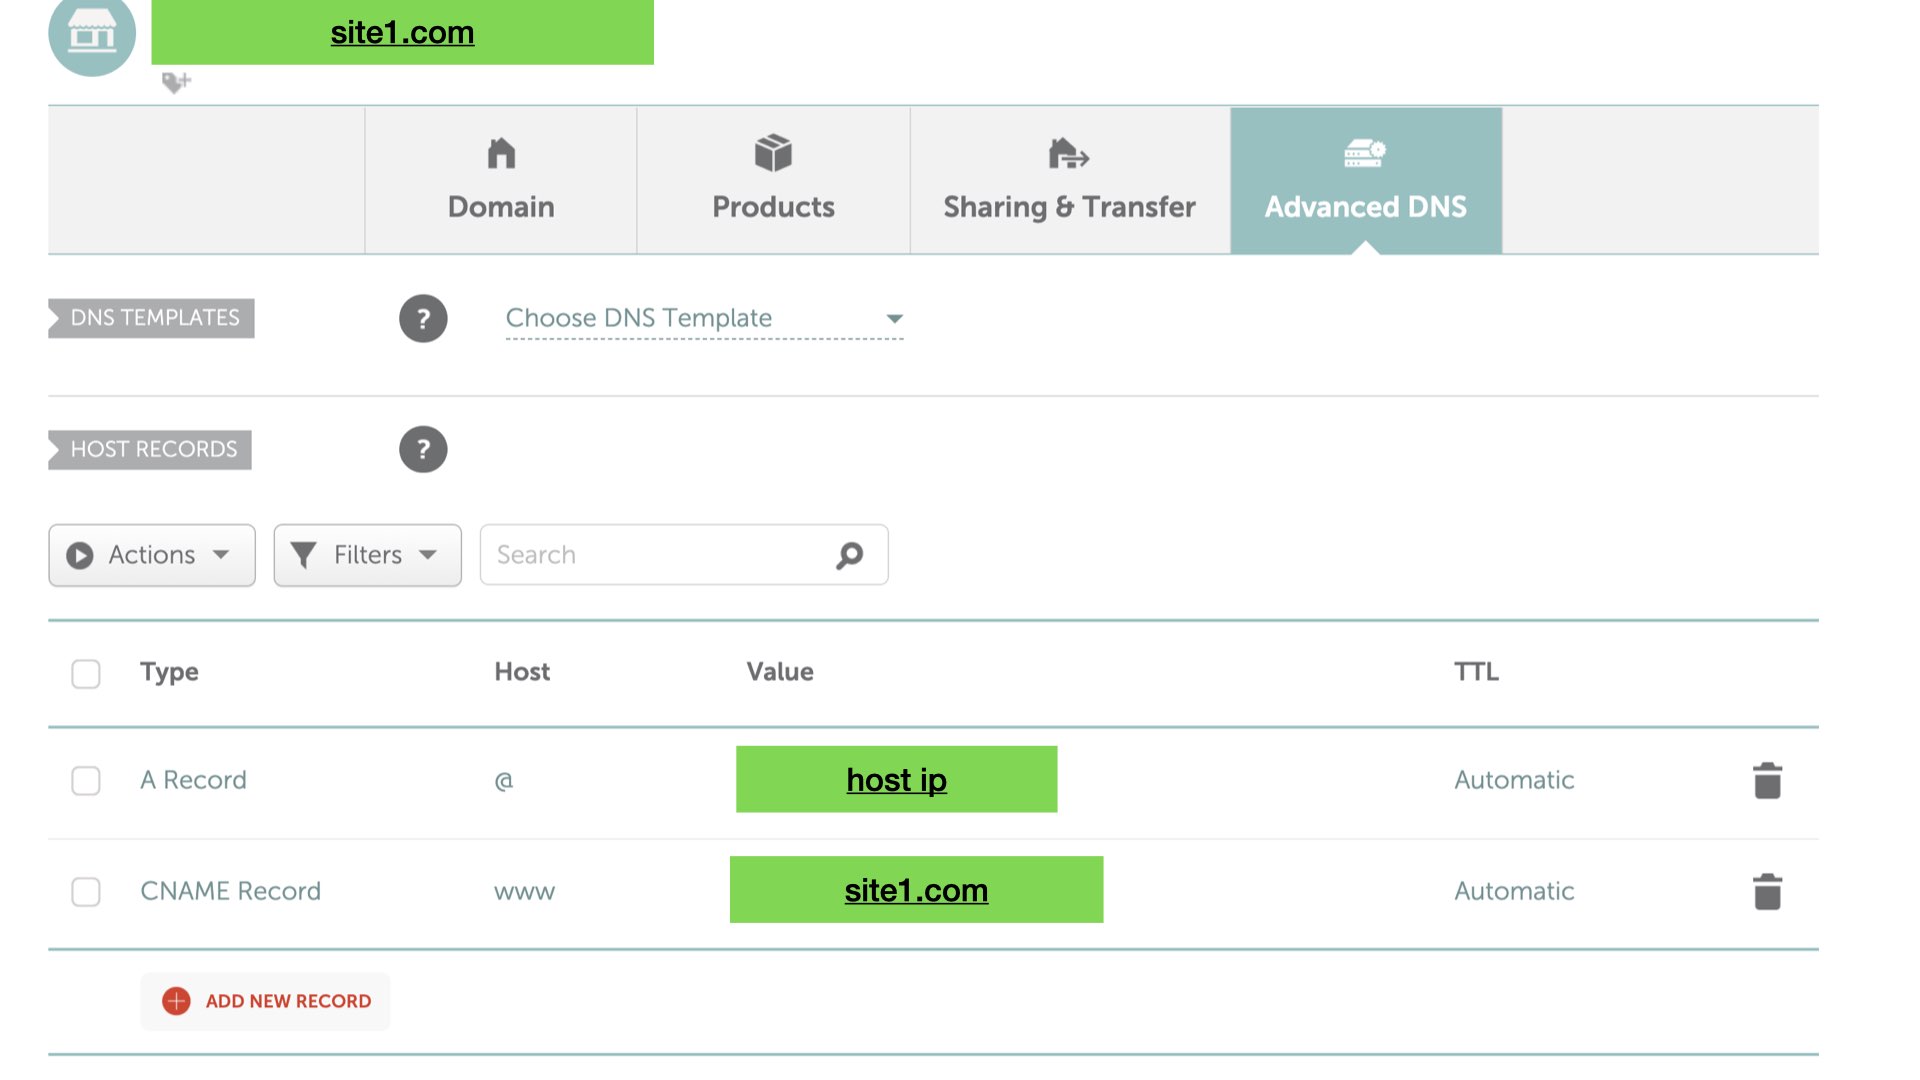
Add a similar configuration for site2. Since they are on the same server and the host ip should be the same, just change site1.com to site2.com
Finally, open site1.com and site2.com in the browser to verify they work as expected.